Overview
In Studio580, a brush is composed of three elements: a link to a source image file, a link to a similarity map file, and a collection of settings. This tutorial assumes that you already have an existing source image file and similarity map file somewhere on your filesystem and simply want to incorporate these into a brush within Studio580. This tutorial does not discuss the process of creating either file from scratch. For information about creating either a source image or a similarity map for use with Studio580, see the Brush Creation Guide.
Installation Procedure
Copy the files—copy both the source image file and similarity map file into the Studio580 User folder. For a discussion of the folder structure of a Studio580 distribution, see the Quick Tour.
Open the Brush Options box—open Studio580 if it’s not already running, then open the Brush Options dialog box. The Brush Options dialog box is illustrated below, but is not comprehensively discussed in this article. For such a comprehensive discussion, see the Quick Tour.
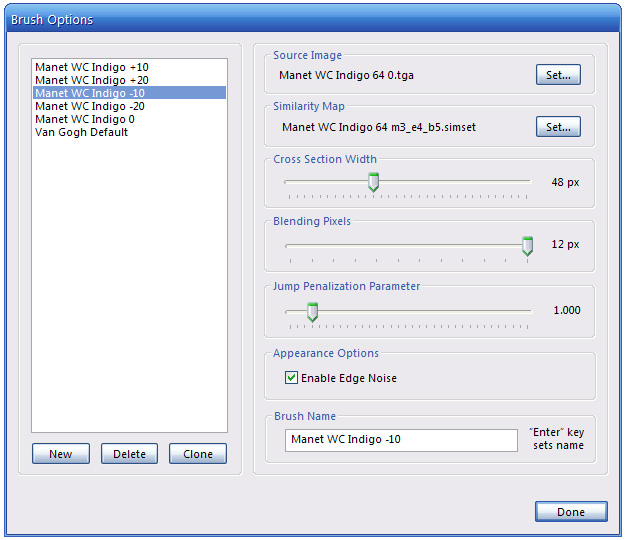
Create a new brush object—click the “New” button just below the brush list to create a new brush object. The brush object will appear in the brush list with a name like “New Brush 1” and will automatically be selected as the current brush.
Name the brush—give your new brush a descriptive name. For example, if the source image that will exemplify the style of the new brush is a predominantly Indigo color and has been extracted from a Manet painting, you might call your new brush “Manet Indigo.” Whatever name you pick, rename the brush object by clicking in the text edit area in the “Brush Name” region of the dialog box. Delete the old name and type your new name, then press the [ENTER] key to set the new name.
Set the source image—click the “Set...” button in the “Source Image” region of the dialog box. A file chooser will open. In the file chooser, navigate to the Studio580 User folder and select the new source image file that you copied in during the first step above.
Set the similarity map—click the “Set...” button in the “Similarity Map” region of the dialog box. A file chooser will open. In the file chooser, navigate to the Studio580 User folder and select the new similarity map file that you copied in during the first step above.
Configure the Jump Penalization Parameter—if you’re installing a brush created by someone else, the brush’s author may have provided you with an ideal value for the jump penalization parameter. In this case, drag the “Jump Penalization Parameter” slider control at the right-center of the dialog box until the value at right matches the value provided by the brush author. If you’re creating a brush from files you’ve prepared yourself, you’ll have to determine an ideal value on your own. See page 4 of the Tips & Tricks Guide for a discussion of the Jump Penalization Parameter.
When you close the Brush Options dialog box, your new brush will be ready for use.